Changing a Motor – Model 1
A guide to changing a motor on a model 1 mover.
Firstly remove the half unit from the caravan (please refer to the Powrtouch fitting instructions)
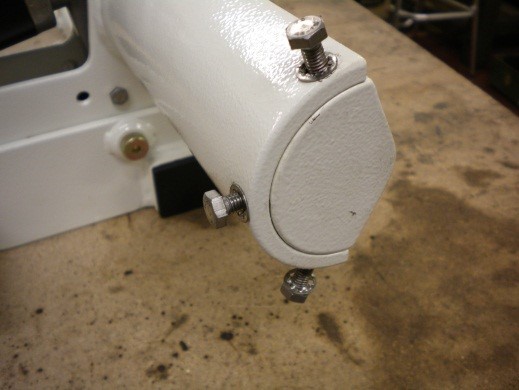
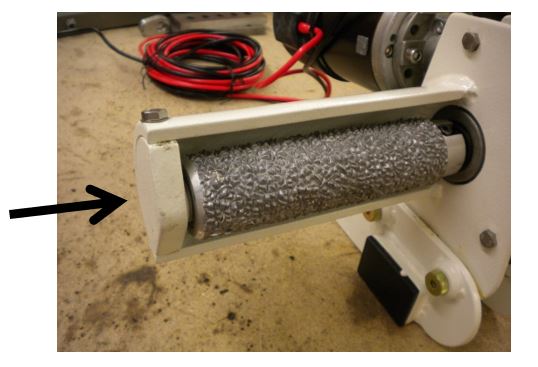
Removing The Roller.
1) Remove the 3 x M6 screws (10mm hexagon head)
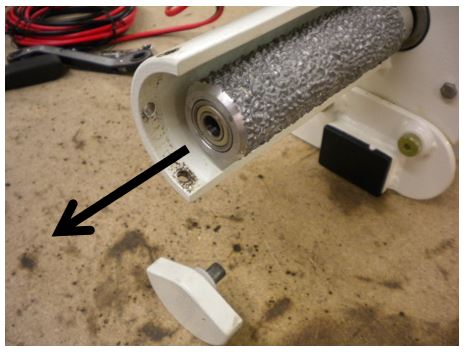
2) Remove the roller end cap.
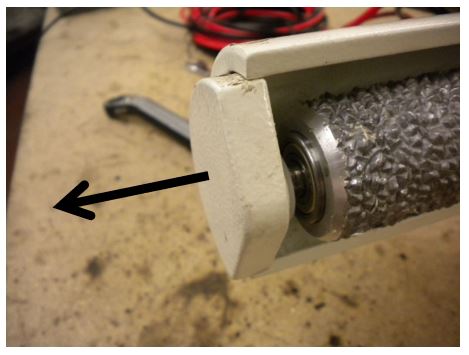
3) Remove the roller by pulling outwards. If roller will not release from the shaft, use penetrating oil to loosen surfaces.
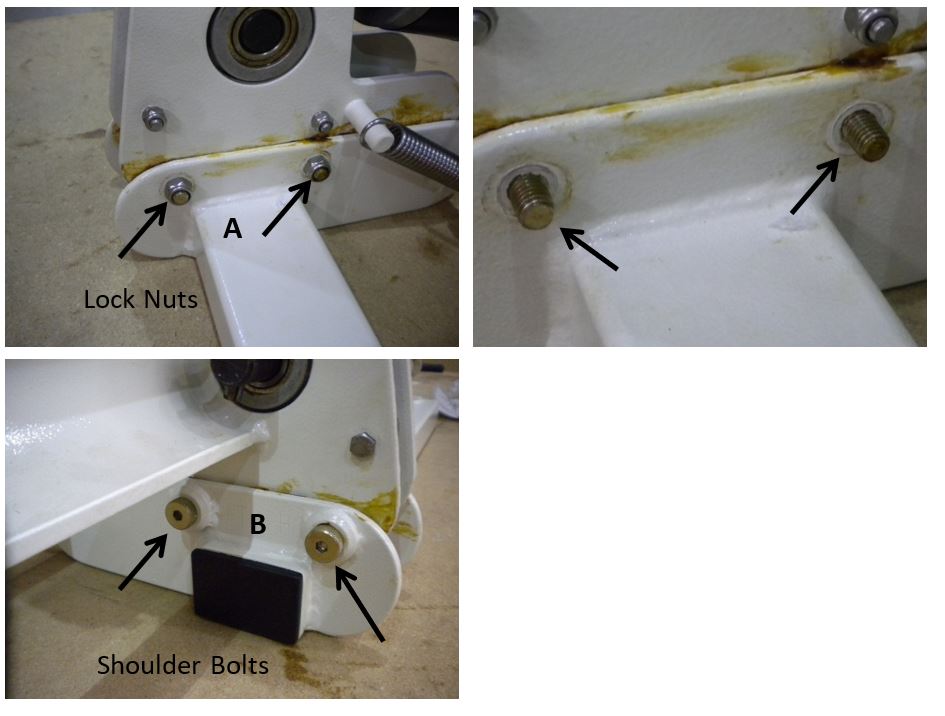
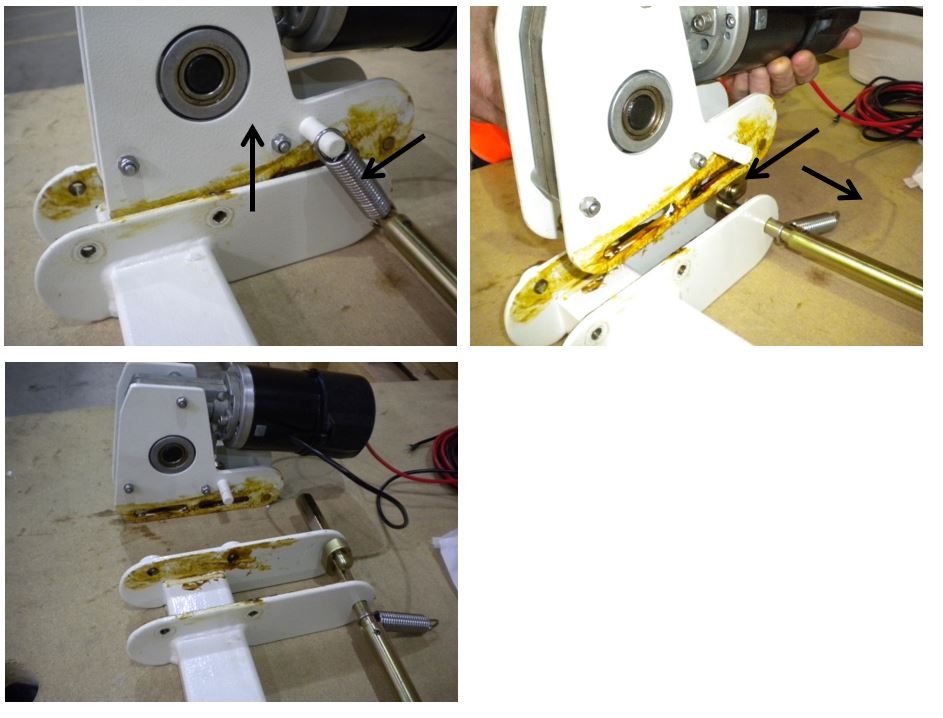
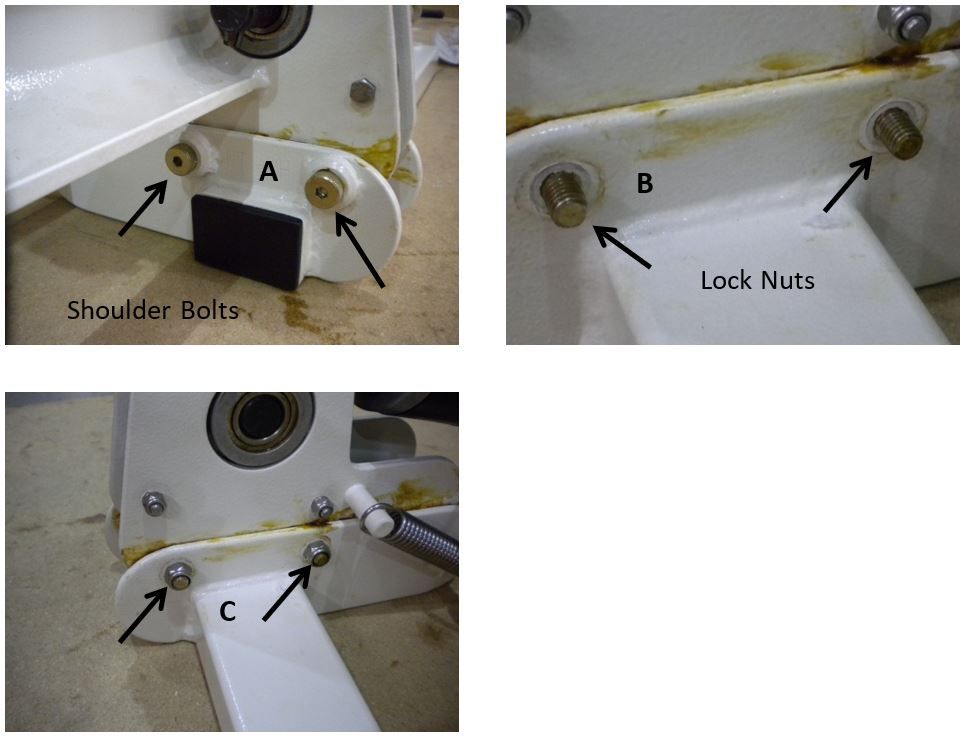
4)
A) Remove the 2 x M8 Nyloc Lock Nuts (13mm Hex)
B) then the shoulder bolts using an M5 Hex Key
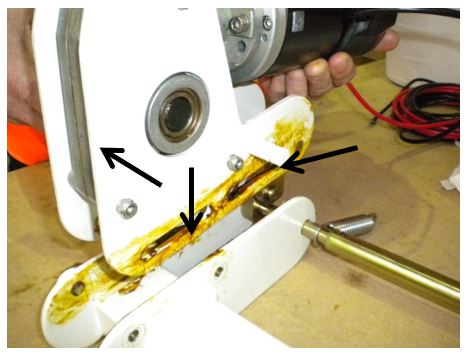
5) Carefully lift the top half from lower carriage then slide sideways to remove Cam from the Push Rod, then remove the return spring.
Separating The Top Section / Replacing The Motor
6) Remove the 3 x M6 Nyloc Lock nuts and then the bolts (10mm head).
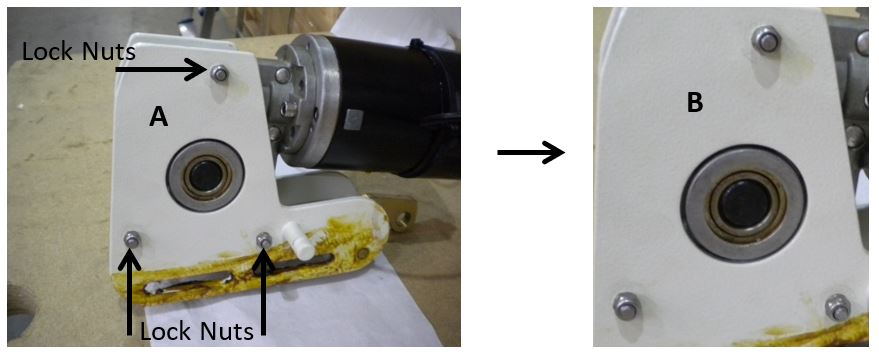
7) Remove the side plate.
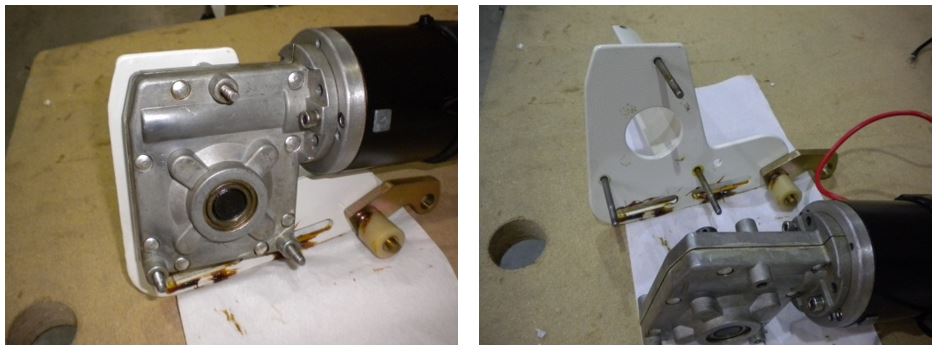
8) You will now be able to remove the old motor and replace it with the new motor.
Re-assemble Top Section
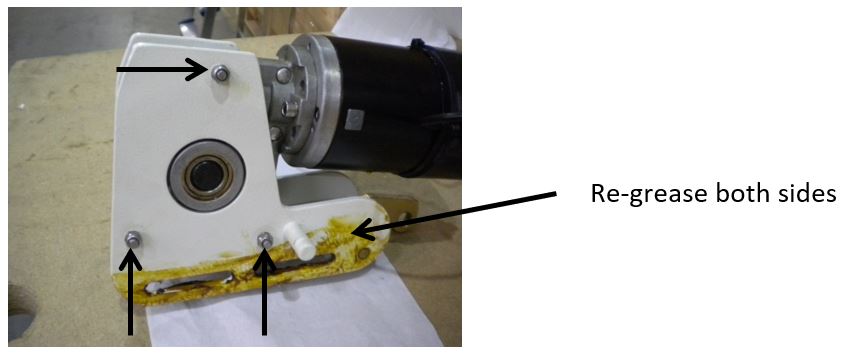
9) Replace the side covers and replace the three bolts. Tighten Lock Nuts to 7.5nm. Re-grease (using general purpose grease) the side plates and lower carriage.
Re-Attach Motor Assembly To Lower Carriage
10) Carefully lower the top half of the mover over the lower half and re-connect the cam assembly.
11)
A) Replace the 2 x shoulder bolts
B) then the M8 Nyloc Nuts.
C) Tighten to 10nm.
12) Replace the return spring.
Replace The Roller
13) It is advisable to coat the motor output shaft with grease before attempting to replace roller. To refit the roller simply push it into position, ensuring the rollers machined slot lines up with the drive pin.

14) Locate the roller end cap into position and tighten the 3 x M6 screws (7.5 nm)
15) Before re-fitting the mover back onto the chassis, fully test the motor to ensure it drives the roller forwards and backwards.